
Change Last Modified Date Plugin Tutorial
See how to freeze the modified date when you update a post to help preserve your SEO.
Install the Plugin
We’ll be using the Change Last Modified Date plugin.
Here’s a quick way to install it to ensure you have the right one:
Go to Plugins > Add New
In the top tabs, click Favorites
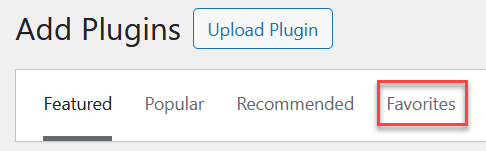
Type in blogaid, all lower case, then click Get Favorites

Locate the Change Last Modified Date plugin and click Install Now

Activate the plugin.
How to Freeze the Modified Date
When you are editing an existing post or page, look in the block sidebar, under the Post tab.
Toggle on Freeze modified date.
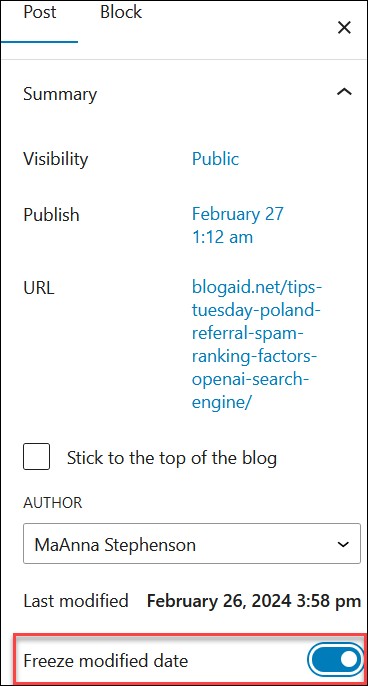
When you update the post, the last modified date will not change.
When and Why to Use This Feature
All posts have 2 dates in the code:
- date published
- date last modified
Google reads these dates.
It doesn’t matter whether you display these dates to the public or not.
Google says they want fresh content.
But, very often when you update a high-ranking post, Google will recrawl it, see the modified date has changed, and possible re-rank it.
In most cases, the ranking will drop.
So, if you are only making minor changes to the post, like a small paragraph update or correction or such, you may want to seriously consider freezing the modified date.
However, if you are rewriting the entire post or making significant changes to more than 50% or so, then you would want to allow the modified date to change, especially if you are trying to get the post to rank higher.
What to Use When Updating Images
If you are substituting old images for new ones, but don’t want to risk dropping your post/page rank, you may also want to use a plugin made for that in conjunction with this plugin.
See the Enable Media Replace plugin tutorial for more.
