
How to Transfer Domain from GoDaddy to Namecheap

See all of the steps required when you transfer your domain from GoDaddy to the less expensive NameCheap registrar.
Following these steps will speed up the process to 1 day instead of 4-7 days.
IMPORTANT
GoDaddy is seriously uneven in how their navigation works.
And they are notorious for making you jump through extra hoops.
This tutorial is what I saw, and where I clicked to get through the process in the most direct path possible.
And there are now tokens to send and input to verify many steps in the process too.
What you see and have to do may be slightly different than shown here, or GoDaddy may have changed the look or the paths to get to things.
If you need support, call GoDaddy or NameCheap for clarification. Please do no ask in the comments of this tutorial.
Verify Nameservers at GoDaddy
Log into your GoDaddy account.
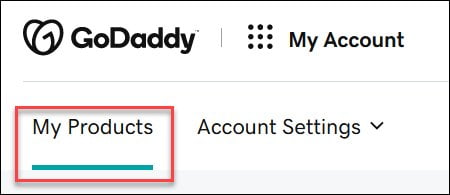
Ensure you are on the My Products tab.
This process is much easier from the My Products tab, not the Domains list tab.
You can click on the GoDaddy logo in the top left to go to the My Products tab.
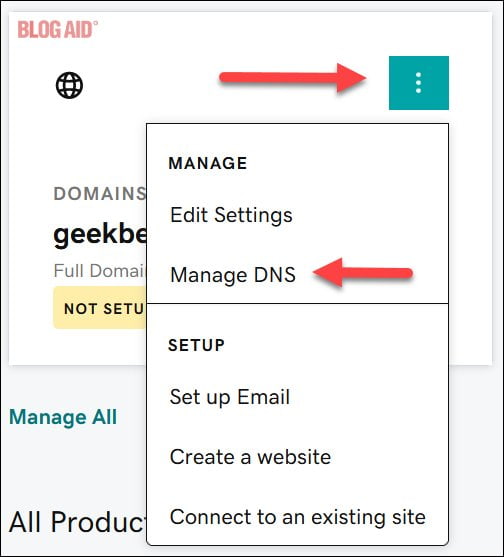
Find the domain you want to transfer, if you have more than one.
Then in the top right of its box, click the More ellipsis – 3 vertical dots.
Then click Manage DNS.
Copy your nameservers.
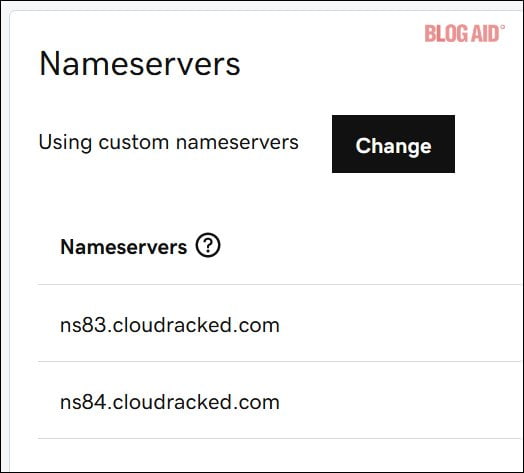
As you can see, this domain is parked, meaning that it is using GoDaddy’s default nameservers and doesn’t point to any host or website.
If your domain is parked, the default nameservers will be different at NameCheap.
If your domain is pointed to the host or Cloudflare or another 3rd party, then you will want to check in NameCheap to ensure they are still pointed to that location.
Downgrade your Domain Protection Plan
This part of the tutorial assumes that you paid extra for a domain protection plan with GoDaddy.
You can use this part of the tutorial to check you protection plan status.
If it already says Basic Plan, then you can skip to the next set of steps to Unlock your domain.
Otherwise, go through these steps to downgrade.
You HAVE to downgrade to the Basic Privacy Plan prior to transfer.
Log into GoDaddy
Go to My Products.
Scroll down until you see Domains.
On the domain to be transferred, click Manage.

At the top, in the Domain Protection Plan, click the Manage button.
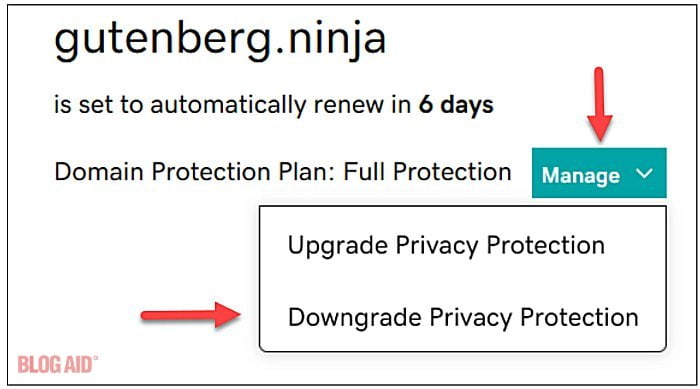
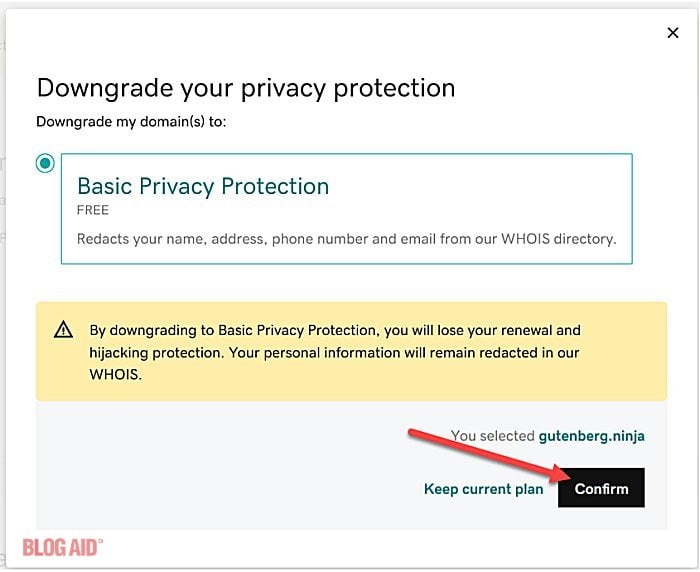
Click Downgrade Privacy Protection.
On the next screen, click Confirm.
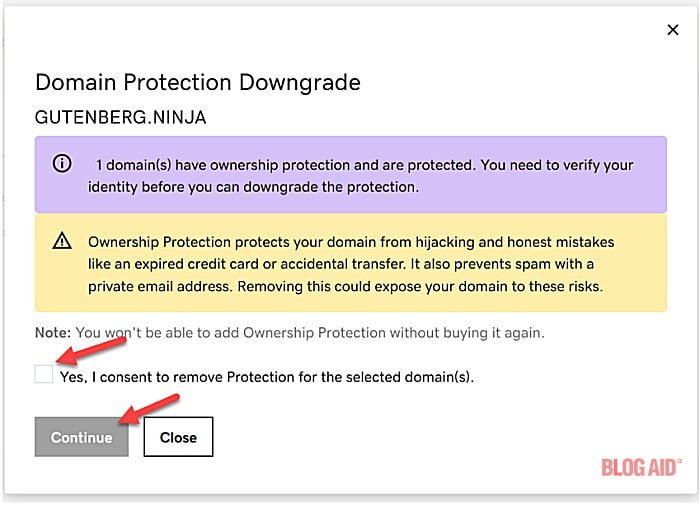
On the next screen, click the checkbox and then click the Continue button.
On the next screen, click Send Password.
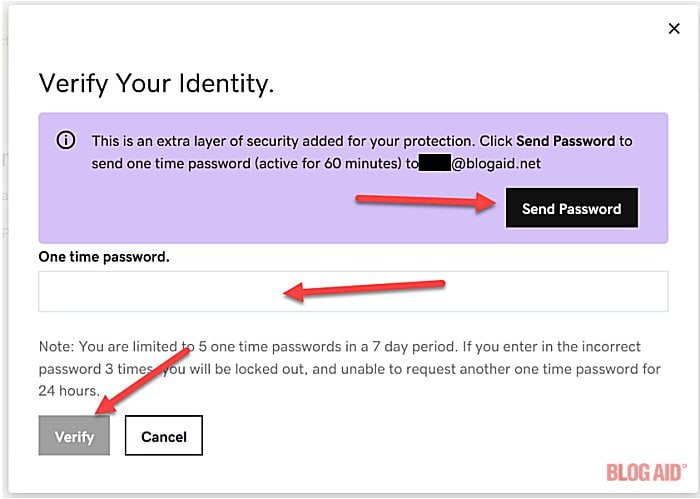
Check your email and input the code.
Then click Verify.
You will see a success message.
Confirm Basic Privacy
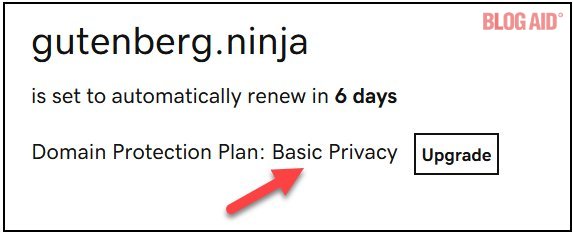
You will need to refresh your browser to see that it has taken effect.
Ensure it says Basic Privacy.
Unlock Your Domain
A locked domain prevents anyone from transferring it to another registrar. It’s a great security feature.
So you will need to turn that off for this process.
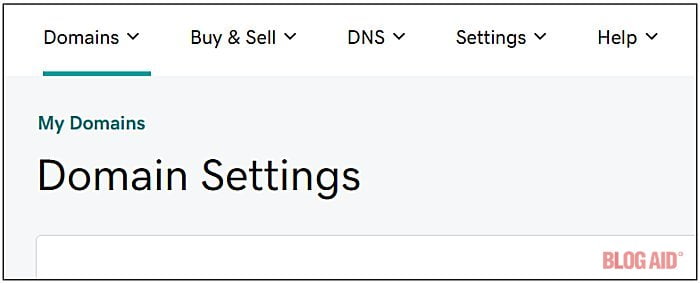
On GoDaddy, in the top left of the page, click Domains if needed to go to the Domains Settings page.
Scroll to the bottom, to the Additional Settings section.
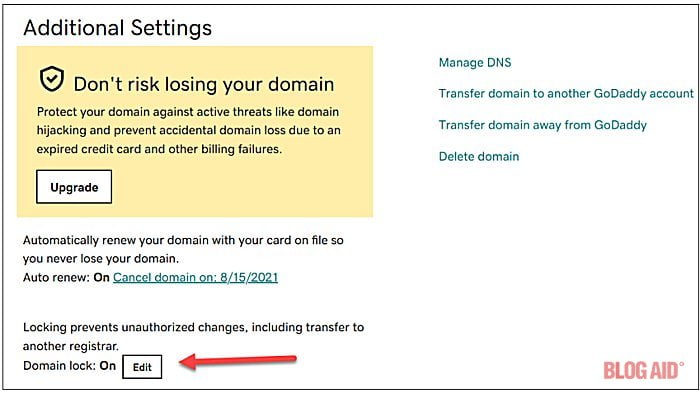
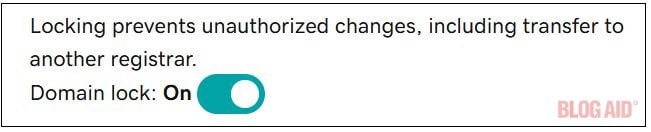
If the Domain lock is On, click the Edit button.
It may go green. And you may need to click that green toggle again too.
And it should display a pop up to authorize the change.
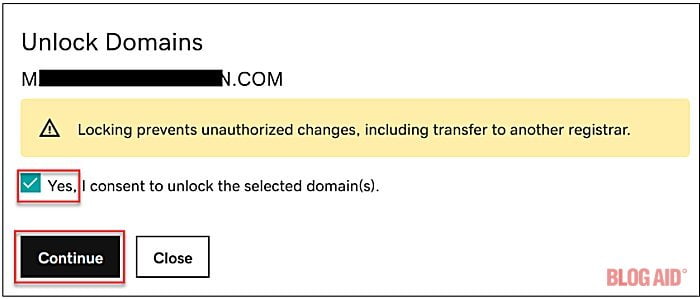
Check the box for Yes, and then click the Continue button.

You will see a noticed that it is Pending Update.
Wait a few minutes and it should change to OFF.
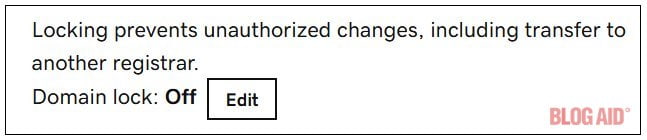
WAIT 90 minutes for the changes to take affect. Then do the next steps.
Transfer Domain Away from GoDaddy
While still in the Additional Settings section, click the link to Transfer domain away from GoDaddy.
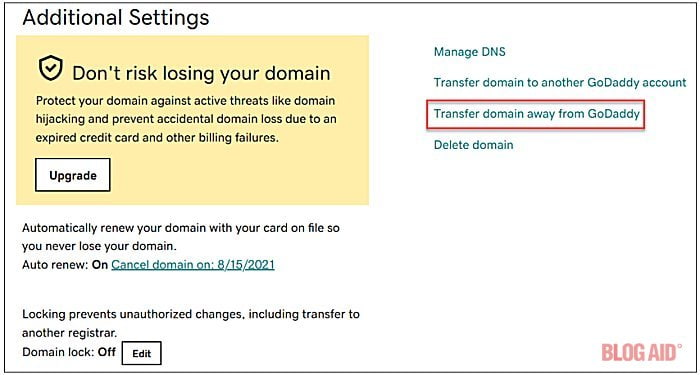
It will redirect you.
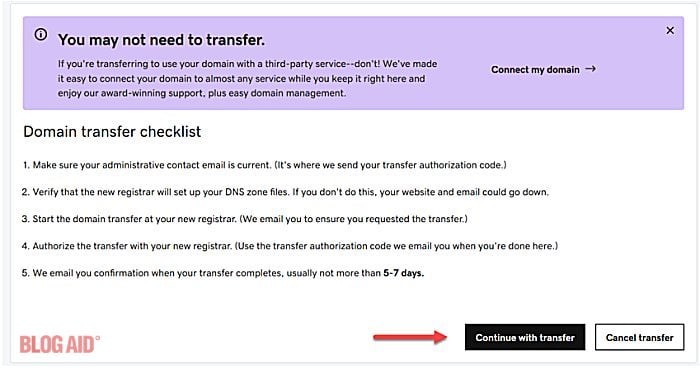
Click Continue with transfer and you will see this.

Click on step 2 to see your Authorization Code.
You can copy it if you like, but it will also be emailed to the address in step 3.
Start NameCheap Transfer Process
Log into your Namecheap account.
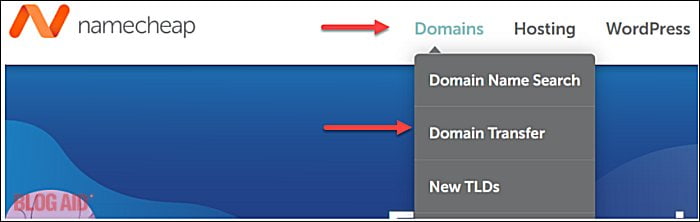
Go to Domains > Domains Transfer
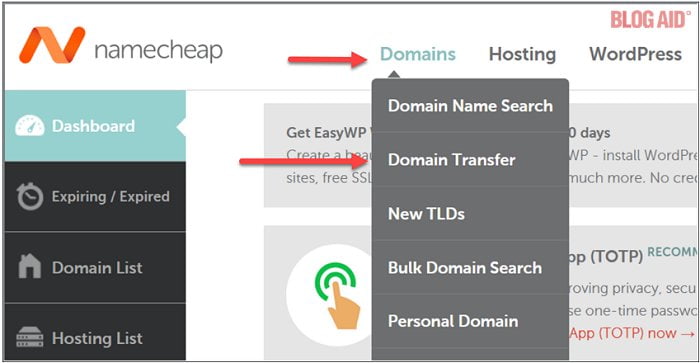
Or it may look like this for you.
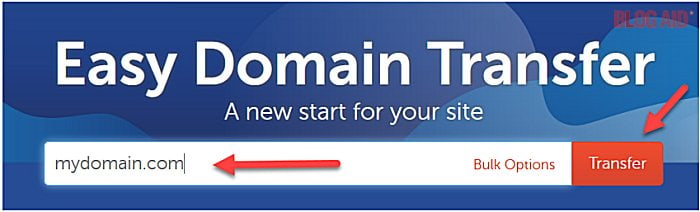
Enter the domain you want to transfer and then click the Transfer button.
It will redirect you to the order page.
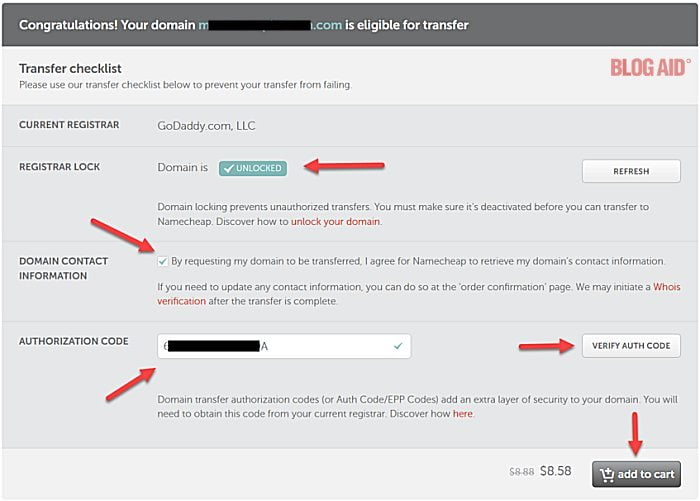
Check the Registrar Lock section and ensure the domain shows as Unlocked. If not, click the Refresh button until it does.
Check the box to have Namecheap retrieve your domain’s contact information.
Then paste in the Authorization Code you copied from GoDaddy.
Then click the Verify Auth Code button.
You should see a green check mark.
Finally, click the add to cart button.
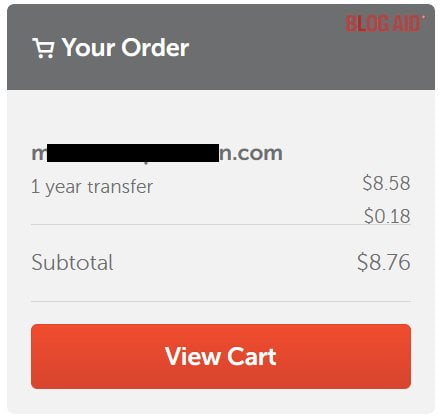
The sidebar displaying Your Order should now be populated with your domain and cost.
Click View Cart.
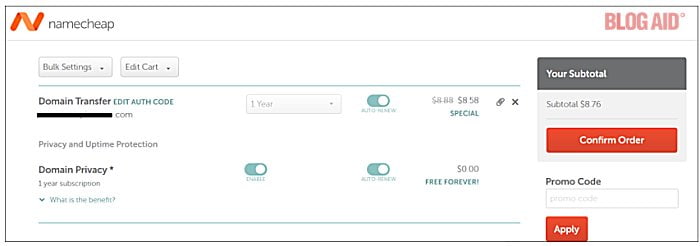
View your order details.
Input a promo code if you have one.
Click Confirm Order.
Then click Pay Now on the next page.
Complete Transfer Process at GoDaddy
You will have received 1-2 emails from GoDaddy and 1 from Namecheap by now.
Wait for an email from GoDaddy to double-check your domain transfer details. It may take 5-10 minutes to come through.
Log into your GoDaddy account.
In the top right, click on My Account > Domains
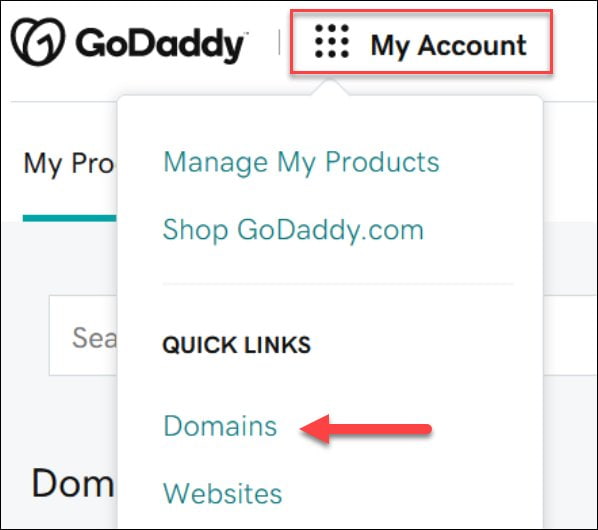
Go to Domains > Transfers.

Click Transfers Out button at the bottom.
You’ll see the one in progress.
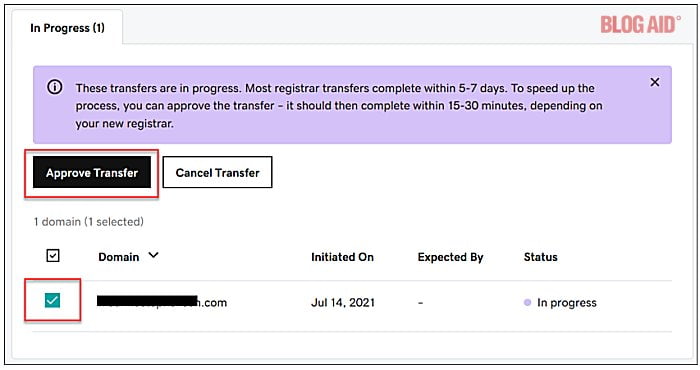
Check the box to the left of the domain.
Then click the Approve Transfer button.
You’ll see a notification in the top right that the update is in progress.
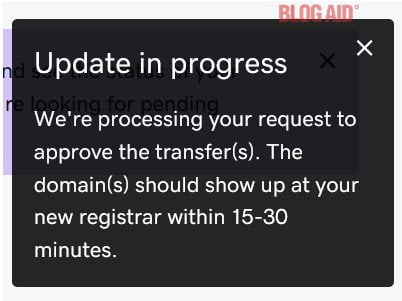
And you’ll see this progress Status.
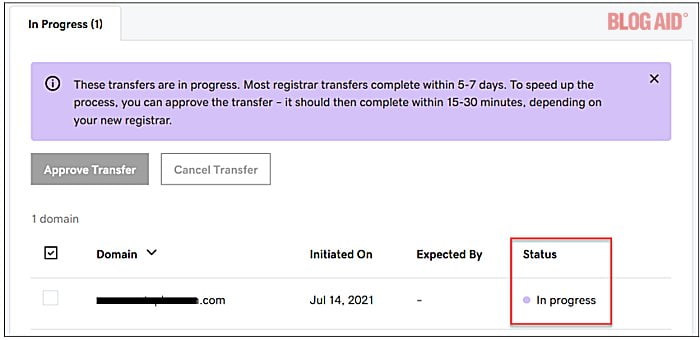
The Status should also show as In progress.
GoDaddy Transfer Complete Email
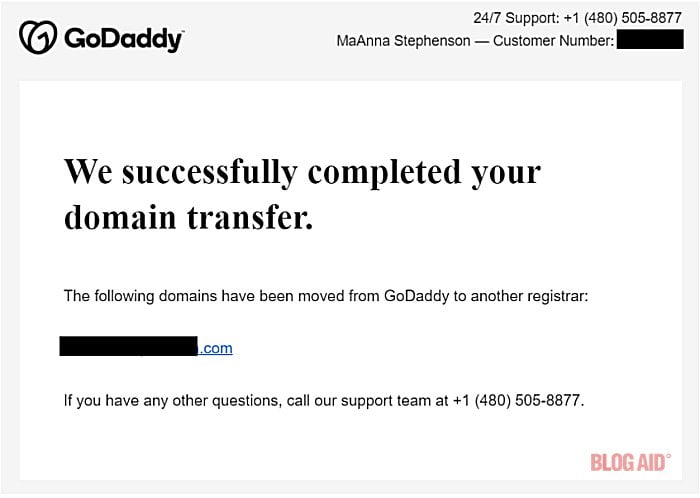
You should receive an email from GoDaddy within minutes stating that the transfer is complete.
Complete Transfer at NameCheap
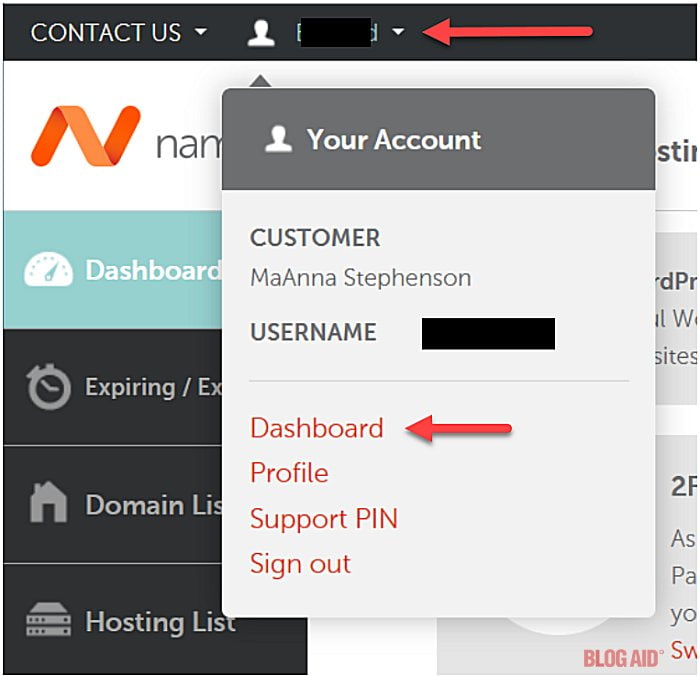
At Namecheap, click on the down arrow in the top right, next to your profile.
Go to your Dashboard.
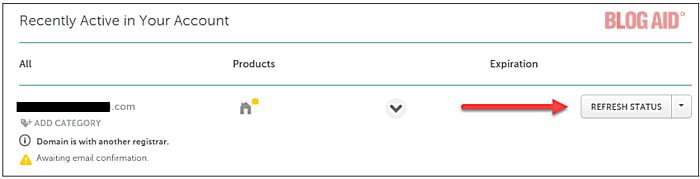
You will likely see that the transfer is awaiting email confirmation.
You can click the Refresh Status to update the activity, but give it at least 30 minutes to an hour to complete.
You may just want to wait for an email from Namecheap stating the transfer is complete.
Once you receive that email, then your domain has been successfully transferred to NameCheap.
Verify Nameservers at NameCheap
Log into NameCheap.
Find the domain name you transferred.
On the right, click the Manage button.

Check that your nameservers are correct.
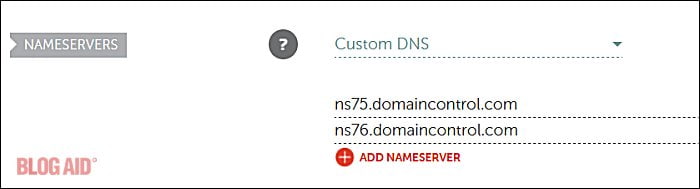
If your domain was parked at GoDaddy, the default namerservers for parking at NameCheap will be different.
If your domain was live, ensure it is pointing to the same place it was at GoDaddy, such as to your host or to Cloudflare or such.
That’s it!!
Your domain is now managed by NameCheap and will renew there.
